Now that we have taken care of our infrastructure let’s briefly learn how to design!
Now, this won’t be a detailed project, but you will learn the following
Difficulty: ♦
Cost: $0
Services:
- WordPress Via AWS Instance
FYI: This project continues the project: Hosting a Website with AWS & WordPress: Simplified with Lightsail. Please go to this section before starting this one.
You should know how to log in to WordPress from our previous project. If you don’t… use the following:
http//:[Your_Instance_IP]/wp-admin
Username: User
Pasword: [Password_From_SSH_Terminal]
-OR-
(SSH)
ssh -i path/to/file.pem bitnami@your.ip.address
Navigation
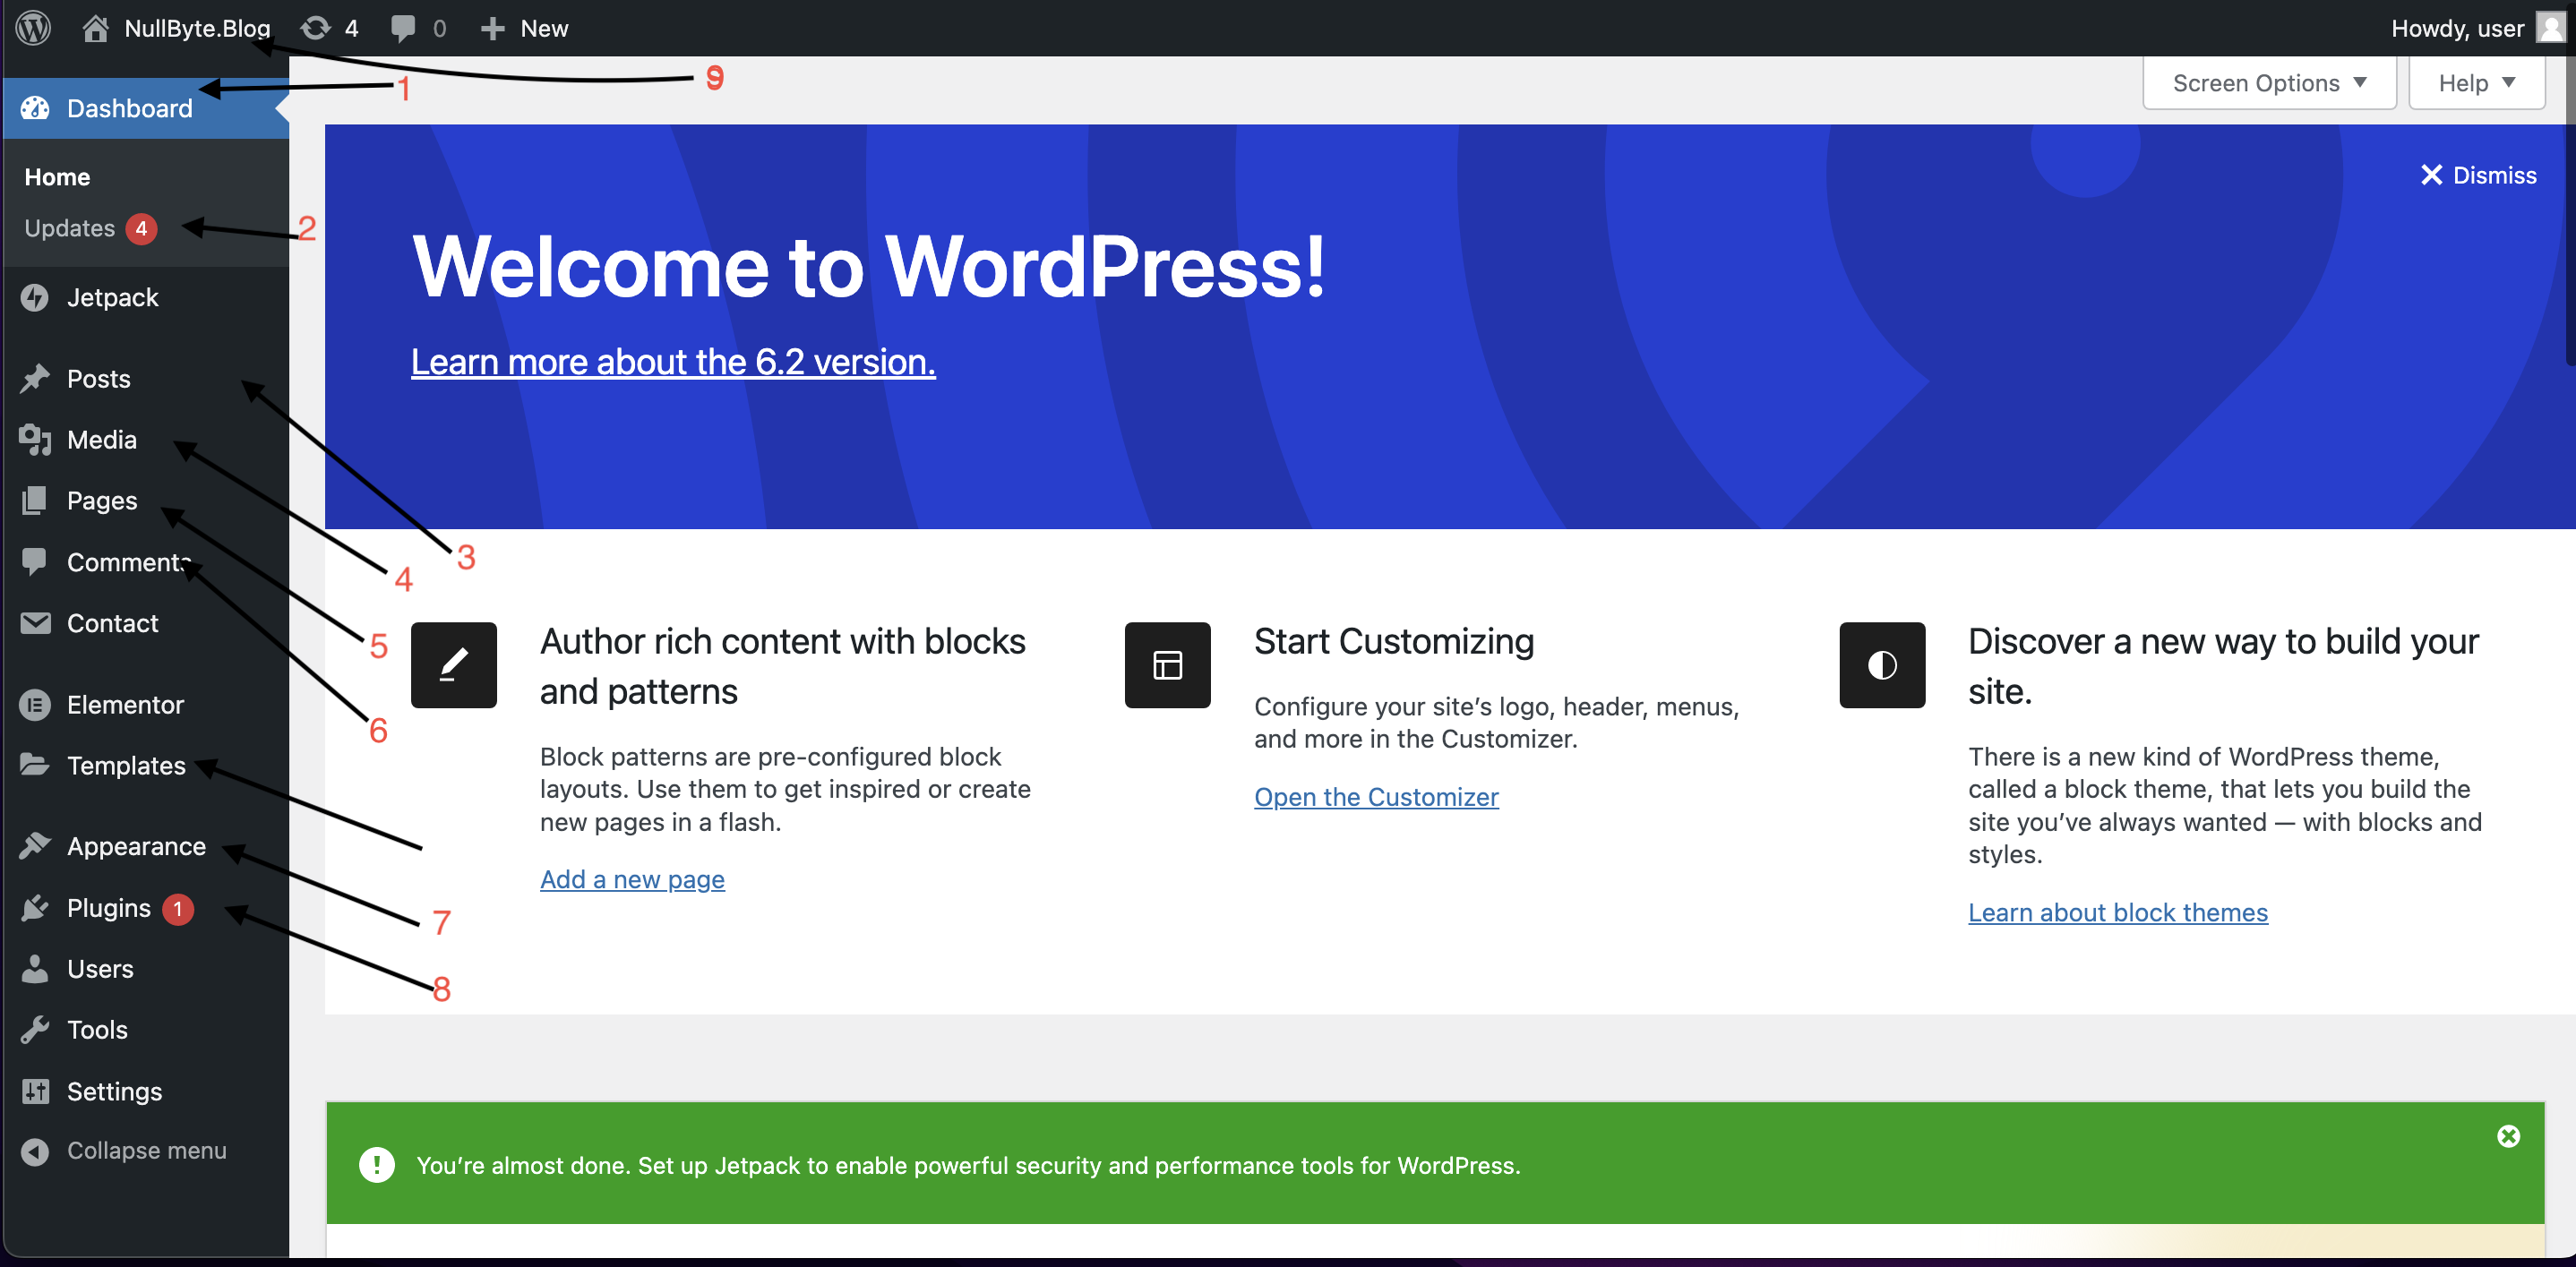
Most things you need to edit your website will be found in the left menu when you first enter WP. Use the following snippet to get a better understanding of what is what.

- Dashboard: this will give the overall status of your websites. It contains features like site health status, quick drafts, events, and news
- Updates: I feel like this is self-explanatory. The update button will allow you to update not just WordPress but any plugin and theme that you are using.
- Post: Most WP websites and appearance templates come pre-configured with a “section.” You don’t need to have it on your website or use it necessarily, but if you are doing a blog, this will be useful
- Media: Any pictures, videos, and files that you upload to your site will be stored here.
- Pages: This is where you will spend the majority of your time. Any pages that need to be put on your website will be added here. Some of the pages that you muse are: About Me, Home, Projects, etc.
- Comments: When you make a post, you are automatically given a comments section where you can remove, hide, and reply.
- Appearances: The best thing about WP is its wide variety of backgrounds and website styles that you can choose from. Note: Some are free, and some you will have to pay for.
- Plugins: This, amongst other things, will ease your website design experience. Plugins can be used to design, enable cache, create tags, etc.
- Page Preview: This button allows you to preview your website and make changes to the overall website.
Templates/Appearances
The section will go over #7 in the navigation snippet. This button will allow you to choose from hundreds of premade websites. All you have to do is add pages and edit the home page to your liking.
At the Home page, head on over to [Appearance >> Themes >> Add New Theme]. You should have something similar to the following snippet.

As mentioned, a few of these templates are free, while most of you will have to pay. However, given that this project intends to create a blog, you should get by with any in the free tier.
Once you choose, install, and activate your template, you should automatically be sent to #9 in the navigation snippet. If you don’t, click Customize after you click Install.
For this example, I will be using the template “XBlogFree.” It doesn’t matter what template you choose; most of them will have the same configuration. The following snippet will show you a guide:
Template Editing

- Site Identity– adds a site logo to your website. This will appear in the tab section of your browser..
- Colors– do I really go to explain this….. Not explaining this one
- Header image– adds a background image to the site title name “User’s Blog.”
- Background Image– Add a background that suits your needs.
- Menus– adds and creates a clickable page that will be displayed next to the “SAMPLE PAGE” listing.
- Widgets– add extra sections that you would like to your home screen.
- X Blog Options– these are options specific to this template. This section will yield different names and options depending on the template.
- Additional CSS– if you want to add any special CSS to customize your blog, you can do it there.
- Pencil icon– allows you to edit the text
- Publish– once you are done, click this button
The following will provide a sample configuration of each listed feature
1. Site Identity
Click Site Identity >> Select Logo >> Upload File
If you do not have your own logo, you can get a free one from Google. Once you add the image, the logo should appear on your browser’s tab once you click update.
For reference, look at the last arrow towards the bottom. You should get a sample of how it will look.

3. Header Image
Click Header Image >> Add new Image >> Add New Image
You should now have your image in the User’s blog area as follows:

4. Background Image
Click: Background Image >> Select Image
Preset & Image: Fit to Screen
Repeat Background Image: Check
*BTW, i am using images from the sample website and mine as well*

5. Menus
Click: Menus >> *if you don’t already have one, click* Create a New Menu>>Add Items
Probably the most important section of your blog. Every time you hit a new item, it will create a new page and should automatically appear in the menu bar of your website.
If you want to redirect your traffic to an external link, click the dropdown on your new page, then paste the link in the URL section.

6. Widgets
Click: Widgets >> Sidebar or Footer Widget.
Depending on the appearance you pick, you will have a pre-made widget section.
You are not limited to the number of sections you want; you also do not need to keep the ones pre-made for you.
The following Snippets will show basic navigation, and we will add a calendar:


The red lines show you where your widgets are in relation to your website.
The green arrows show you where you can add more widgets; in our case, we will add a calendar using the following:
Plus sign “+” >> Browse All >> Widgets tab >> Calander
The snippet shows you the calendar on the right sidebar towards the bottom
Bonus!
At the snippet on the right, the red arrow shows you a list of options that you can use to edit your widget.
This can be applied to every other section.
Starting from left to right
- Calander logo: allows you to change the appearance and format of your calendar; such is true with any other widget. The leftmost box will allow you to do just that.
- Six dots: allows you to move your widget up and down the side-bar freely
- Up & Down Arrows: allow you to move your widget up or down the list of the widgets you have
- Align: This allows you to align your widget to the left or right.
- Swivel: This will allow you to move your widget to another area
7. X Blog Options
Click: X Blog Options *Name will vary depending on the appearance template you picked*
I will not go into detail since the options vary from template to template. As mentioned this will allows you to edit areas and the overall website.

8. Plugins
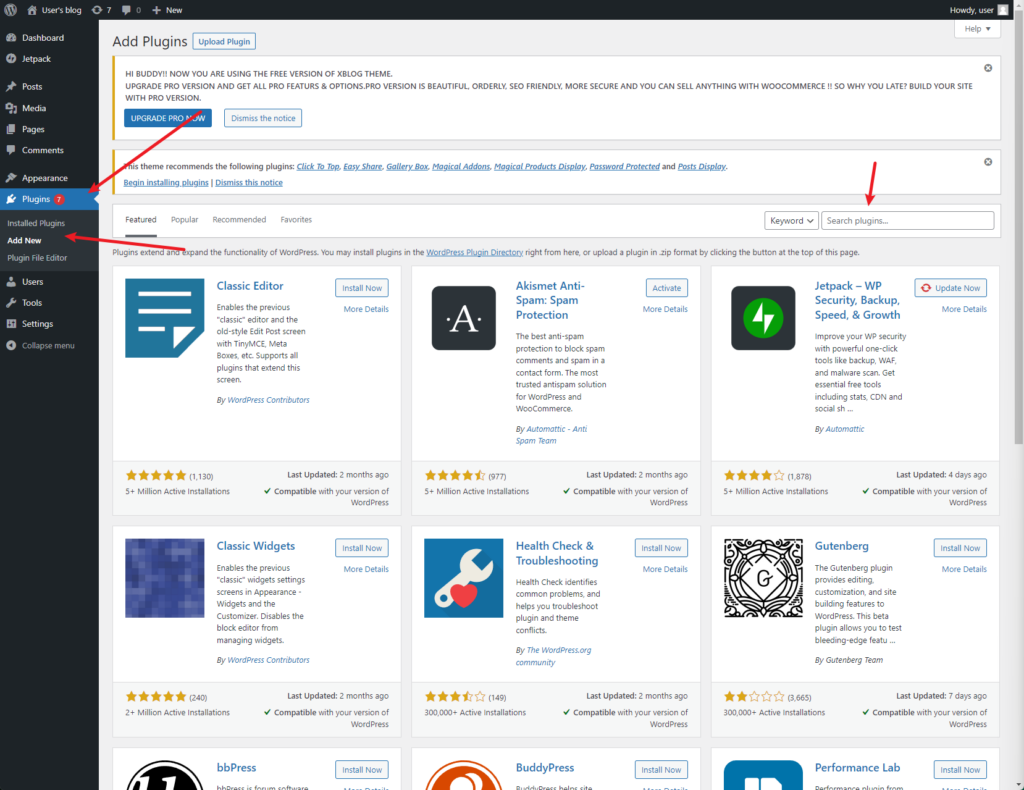
This is one of those sections that I will let you discover for yourself.
Plugins are the life of your website, and they vary in their functions. With some of the most notable being:
- JetPack
- Paypal
- MonsterInsights
9. Page Preview

Just as the title says, this button will show you a preview and allows you to customize it as you navigate through your website.

Thank you for going through with this project; if you have any questions, reach out directly on my Linkedin– Oscar Cardenas SCS, SAA, CCP, S+, N+